
Soil Mechanics and Foundation Engineering/ Dr. Ahmad Fahmi / Professional Excel Spreadsheet Designer
In the name of God /Dr. Ahmad Fahmi's Weblog
Soil Mechanics and Foundation Engineering/ Dr. Ahmad Fahmi / Professional Excel Spreadsheet Designer
In the name of God /Dr. Ahmad Fahmi's WeblogHow can we efficiently learn to analyze Consolidated Drained Triaxial Test (CD) results in soil using Excel Spreadsheet
Drained Triaxial Test (CD)/ Excel spreadsheets

Analyzing Consolidated Drained (CD) Triaxial Test results using an Excel spreadsheet provides an efficient way to interpret soil behavior under drained conditions, where pore water pressure is allowed to dissipate. The CD test is commonly used to evaluate the shear strength parameters of soil, such as cohesion (c) and the angle of internal friction (ϕ). To analyze CD test results in Excel, start by inputting the raw data from the test, including axial load, confining pressure, and deformation measurements. You can use Excel formulas to calculate key parameters like deviator stress, axial strain, and volumetric strain. Plotting stress-strain curves and Mohr’s circles for different confining pressures allows you to visualize the behavior of soil under various loading conditions. Excel’s built-in regression tools can also be used to derive the failure envelope, helping to determine the soil’s shear strength parameters (c and ϕ). With Excel’s capability to automate calculations and generate graphs, it becomes a powerful tool for efficiently analyzing CD test results and understanding soil behavior under drained conditions.
https://www.youtube.com/@Dr.Fahmi.GEOtExcel
Designed by Dr. Ahmad Fahmi
How can we comprehensively learn about Bearing Capacity? ,Terzaghi, Hansen, Vesic, and Meyerhof's Methods
Bearing Capacity calculator: Geotechnical Excel Spreadsheet (GEOtExcel)
Terzaghi, Hansen, Vesic, and Meyerhof's Methods: Comparison

Learning about bearing capacity and foundation engineering using Excel spreadsheets allows for a practical, hands-on approach to understanding critical concepts in geotechnical design. Bearing capacity refers to the ability of soil to support the loads applied by a foundation, and it is calculated using different empirical and analytical methods developed by geotechnical pioneers like Terzaghi, Hansen, Vesic, and Meyerhof. By creating Excel spreadsheets, you can systematically calculate the bearing capacity under various conditions such as soil type, footing size, depth, and load characteristics. Excel can be used to input data, apply formulas for each method (e.g., Terzaghi’s formula for shallow foundations), and generate results such as ultimate bearing capacity. Hansen and Vesic methods include more detailed parameters like shape, depth, and inclination factors, which can also be calculated in Excel. Meyerhof’s method is often used for multi-layered soils or different load conditions. With Excel's functionality for repetitive calculations, and graphing, it becomes an invaluable tool for comparing the results of these different methods, allowing for a comprehensive understanding of bearing capacity principles and foundation engineering design.
https://www.youtube.com/@Dr.Fahmi.GEOtExcel
Designed by Dr. Ahmad Fahmi
RQD Calculation (Rock Quality Designation): GEOtExcel: Geotechnical Excel Spreadsheets & Lectures
Training on Calculating the RQD Parameter in Engineering Geology Using a Designed Program in Excel Spreadsheet (Random Examples)
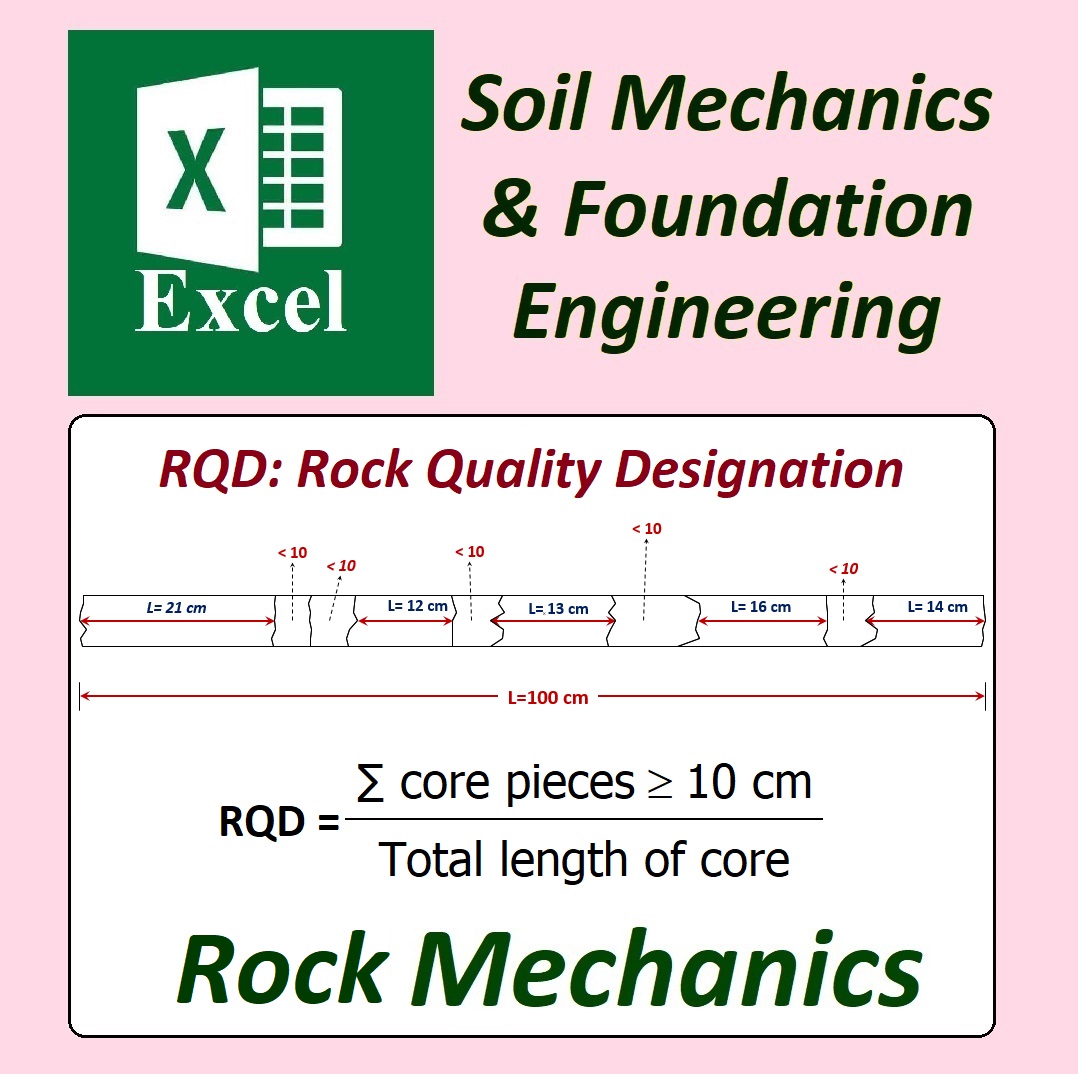
Rock Quality Designation (RQD) is an important measure in geotechnical engineering used to assess the quality and fracturing of rock masses. It is calculated as the percentage of rock core pieces longer than 10 cm (4 inches) relative to the total drilled length. To calculate RQD in Excel, start by inputting the lengths of all core pieces recovered from a drilling operation. Next, filter the data to identify only the core segments longer than 10 cm. Using Excel’s built-in functions, sum these qualified core lengths and divide the result by the total core length drilled. Multiply the final ratio by 100 to express the RQD as a percentage. Excel’s capabilities also allow for quick adjustments, visualization through charts, and easy recalculations, making it an efficient tool for conducting RQD analysis.
https://www.youtube.com/@Dr.Fahmi.GEOtExcel
Designed by Dr. Ahmad Fahmi
How to use a plasticity chart to classify fine-grained soil using Excel spreadsheet
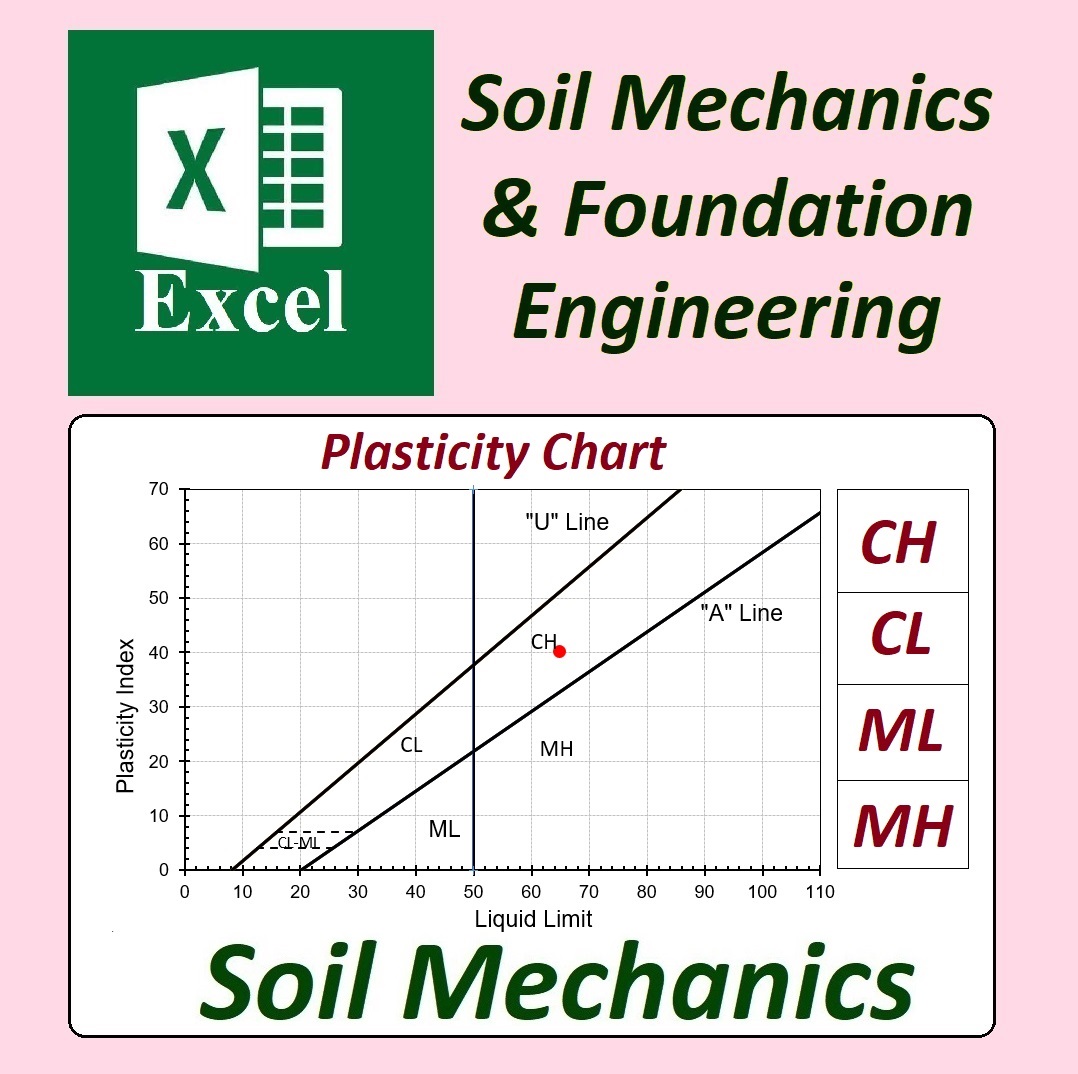
A plasticity chart is a useful tool in geotechnical engineering for classifying fine-grained soils based on their plasticity characteristics. The chart plots the liquid limit (LL) and plasticity index (PI) of a soil sample, which are determined through laboratory tests such as the Atterberg limits. To classify soil using this chart in an Excel spreadsheet, you first input the values of LL and PI from your tests. Excel can then be used to plot these data points on the plasticity chart, typically overlaying them on a pre-made grid that distinguishes between various soil types (e.g., clay, silt, or organic soil). By plotting the data points in Excel, you can quickly determine the soil classification based on its location on the chart. This method is efficient and allows for accurate soil categorization in line with established classification systems such as the Unified Soil Classification System (USCS).
https://www.youtube.com/@Dr.Fahmi.GEOtExcel
Designed by Dr. Ahmad Fahmi
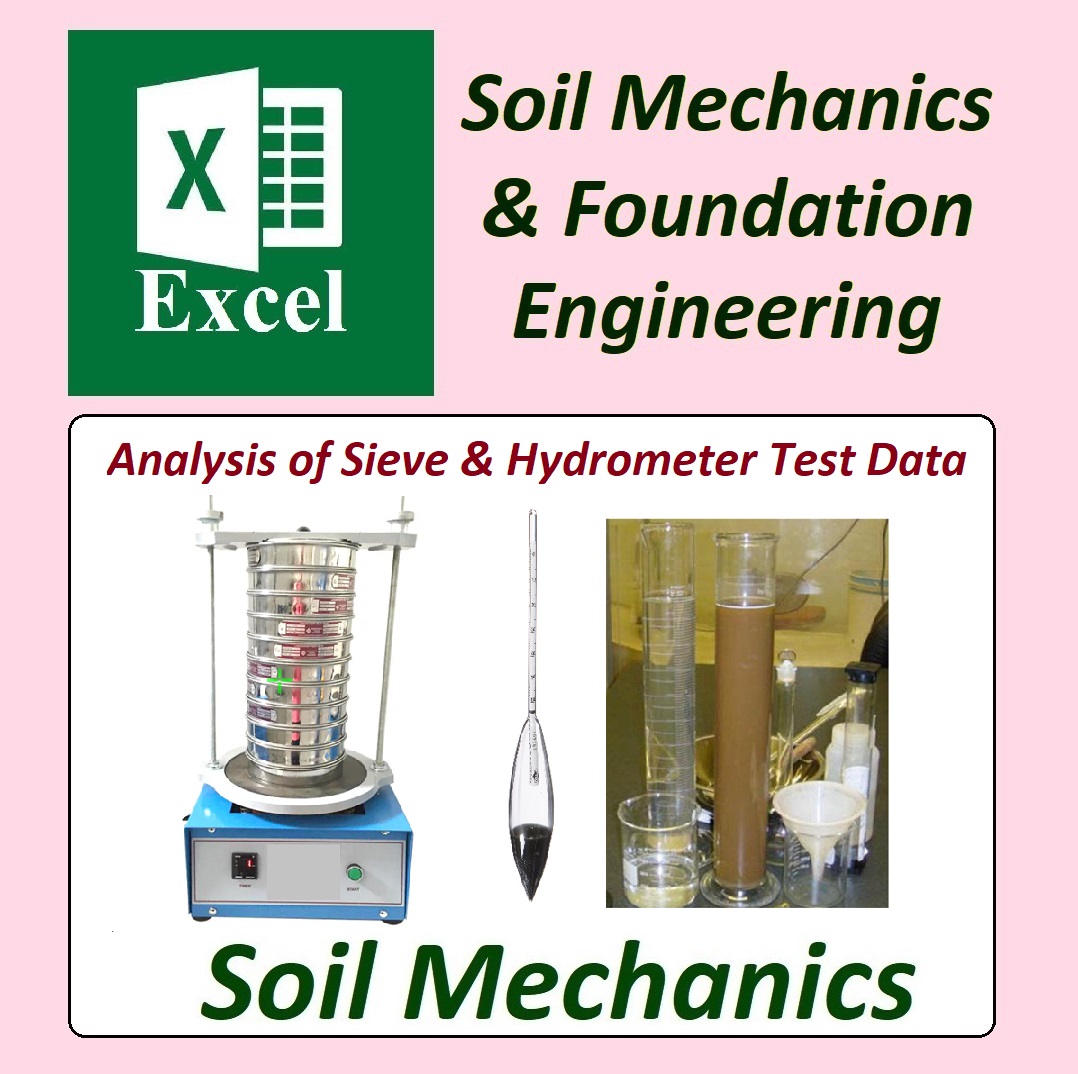
Draw a soil particle distribution curve using Sieve and Hydrometer tests in an Excel spreadsheet
Discover how to draw a soil particle distribution curve using Sieve and Hydrometer tests in an Excel spreadsheet
Watch the Video on Our YouTube Channel (in English)
In geotechnical engineering, understanding the distribution of soil particle sizes is crucial for assessing soil properties. To create a soil particle distribution curve, engineers commonly use Sieve and Hydrometer tests. The Sieve test separates coarse particles, while the Hydrometer test measures the finer particles suspended in a liquid. Once the data from both tests are collected, it can be easily input into an Excel spreadsheet. Using Excel, you can calculate cumulative percentages of particles retained or passed through various sieve sizes and plot them to generate a smooth soil particle distribution curve. This graphical representation helps visualize the gradation of the soil, offering insights into its characteristics, such as grain size distribution, which is essential for soil classification and design decisions.
https://www.youtube.com/@Dr.Fahmi.GEOtExcel
Designed by Dr. Ahmad Fahmi